In this tutorial, let’s learn how to create reusable components in Angular. I’ll be making use of Angular’s @Input and @Output directives.
Source code from this tutorial is available at GitHub.
You can also follow the video tutorial on YouTube.
{% include youtube_embed.html id=“K9UOCMYrBCY” %}
Creating an Angular App
Assuming that you already have Angular CLI installed, create an Angular app using the CLI.
ng new reusable-comp
Once you have the boilerplate project created, you need to install Bootstrap in your application.
Add the following code to the app.component.html file.
<div class="container">
    <div class="main">
        <div class="py-5 text-center">
            <h2>Checkout form</h2>
            <p class="lead">Below is an example form built entirely with Bootstrap’s form controls. Each required form
                group has
                a validation state that can be triggered by attempting to submit the form without completing it.</p>
        </div>
        <div class="row g-5">
            <div class="col-md-5 col-lg-4 order-md-last">
                <h4 class="d-flex justify-content-between align-items-center mb-3">
                    <span class="text-primary">Your cart</span>
                    <span class="badge bg-primary rounded-pill">3</span>
                </h4>
                <ul class="list-group mb-3">
                    <li class="list-group-item d-flex justify-content-between lh-sm">
                        <div>
                            <h6 class="my-0">Product name</h6>
                            <small class="text-muted">Brief description</small>
                        </div>
                        <span class="text-muted">$12</span>
                    </li>
                    <li class="list-group-item d-flex justify-content-between lh-sm">
                        <div>
                            <h6 class="my-0">Second product</h6>
                            <small class="text-muted">Brief description</small>
                        </div>
                        <span class="text-muted">$8</span>
                    </li>
                    <li class="list-group-item d-flex justify-content-between lh-sm">
                        <div>
                            <h6 class="my-0">Third item</h6>
                            <small class="text-muted">Brief description</small>
                        </div>
                        <span class="text-muted">$5</span>
                    </li>
                    <li class="list-group-item d-flex justify-content-between bg-light">
                        <div class="text-success">
                            <h6 class="my-0">Promo code</h6>
                            <small>EXAMPLECODE</small>
                        </div>
                        <span class="text-success">−$5</span>
                    </li>
                    <li class="list-group-item d-flex justify-content-between">
                        <span>Total (USD)</span>
                        <strong>$20</strong>
                    </li>
                </ul>
                <form class="card p-2">
                    <div class="input-group">
                        <input type="text" class="form-control" placeholder="Promo code">
                        <button type="submit" class="btn btn-secondary">Redeem</button>
                    </div>
                </form>
            </div>
            <div class="col-md-7 col-lg-8">
                <h4 class="mb-3">Billing address</h4>
                <form class="needs-validation" novalidate>
                    <div class="row g-3">
                        <div class="col-sm-6">
                            <label for="firstName" class="form-label">First name</label>
                            <input type="text" class="form-control" id="firstName" placeholder="" value="" required>
                            <div class="invalid-feedback">
                                Valid first name is required.
                            </div>
                        </div>

                        <div class="col-sm-6">
                            <label for="lastName" class="form-label">Last name</label>
                            <input type="text" class="form-control" id="lastName" placeholder="" value="" required>
                            <div class="invalid-feedback">
                                Valid last name is required.
                            </div>
                        </div>

                        <div class="col-12">
                            <label for="username" class="form-label">Username</label>
                            <div class="input-group has-validation">
                                <span class="input-group-text">@</span>
                                <input type="text" class="form-control" id="username" placeholder="Username" required>
                                <div class="invalid-feedback">
                                    Your username is required.
                                </div>
                            </div>
                        </div>

                        <div class="col-12">
                            <label for="email" class="form-label">Email <span
                                    class="text-muted">(Optional)</span></label>
                            <input type="email" class="form-control" id="email" placeholder="you@example.com">
                            <div class="invalid-feedback">
                                Please enter a valid email address for shipping updates.
                            </div>
                        </div>

                        <div class="col-12">
                            <label for="address" class="form-label">Address</label>
                            <input type="text" class="form-control" id="address" placeholder="1234 Main St" required>
                            <div class="invalid-feedback">
                                Please enter your shipping address.
                            </div>
                        </div>

                        <div class="col-12">
                            <label for="address2" class="form-label">Address 2 <span
                                    class="text-muted">(Optional)</span></label>
                            <input type="text" class="form-control" id="address2" placeholder="Apartment or suite">
                        </div>

                    </div>

                    <hr class="my-4">

                    <div class="form-check">
                        <input type="checkbox" class="form-check-input" id="same-address">
                        <label class="form-check-label" for="same-address">Shipping address is the same as my billing
                            address</label>
                    </div>

                    <div class="form-check">
                        <input type="checkbox" class="form-check-input" id="save-info">
                        <label class="form-check-label" for="save-info">Save this information for next time</label>
                    </div>

                    <hr class="my-4">

                    <h4 class="mb-3">Payment</h4>

                    <div class="my-3">
                        <div class="form-check">
                            <input id="credit" name="paymentMethod" type="radio" class="form-check-input" checked
                                required>
                            <label class="form-check-label" for="credit">Credit card</label>
                        </div>
                        <div class="form-check">
                            <input id="debit" name="paymentMethod" type="radio" class="form-check-input" required>
                            <label class="form-check-label" for="debit">Debit card</label>
                        </div>
                        <div class="form-check">
                            <input id="paypal" name="paymentMethod" type="radio" class="form-check-input" required>
                            <label class="form-check-label" for="paypal">PayPal</label>
                        </div>
                    </div>

                    <div class="row gy-3">
                        <div class="col-md-6">
                            <label for="cc-name" class="form-label">Name on card</label>
                            <input type="text" class="form-control" id="cc-name" placeholder="" required>
                            <small class="text-muted">Full name as displayed on card</small>
                            <div class="invalid-feedback">
                                Name on card is required
                            </div>
                        </div>

                        <div class="col-md-6">
                            <label for="cc-number" class="form-label">Credit card number</label>
                            <input type="text" class="form-control" id="cc-number" placeholder="" required>
                            <div class="invalid-feedback">
                                Credit card number is required
                            </div>
                        </div>

                        <div class="col-md-3">
                            <label for="cc-expiration" class="form-label">Expiration</label>
                            <input type="text" class="form-control" id="cc-expiration" placeholder="" required>
                            <div class="invalid-feedback">
                                Expiration date required
                            </div>
                        </div>

                        <div class="col-md-3">
                            <label for="cc-cvv" class="form-label">CVV</label>
                            <input type="text" class="form-control" id="cc-cvv" placeholder="" required>
                            <div class="invalid-feedback">
                                Security code required
                            </div>
                        </div>
                    </div>

                    <hr class="my-4">

                    <button class="w-100 btn btn-primary btn-lg" type="submit">Continue to checkout</button>
                </form>
            </div>
        </div>
    </div>
</div>
Add the following CSS to app.component.css.
.main{
     margin: 50px;
}
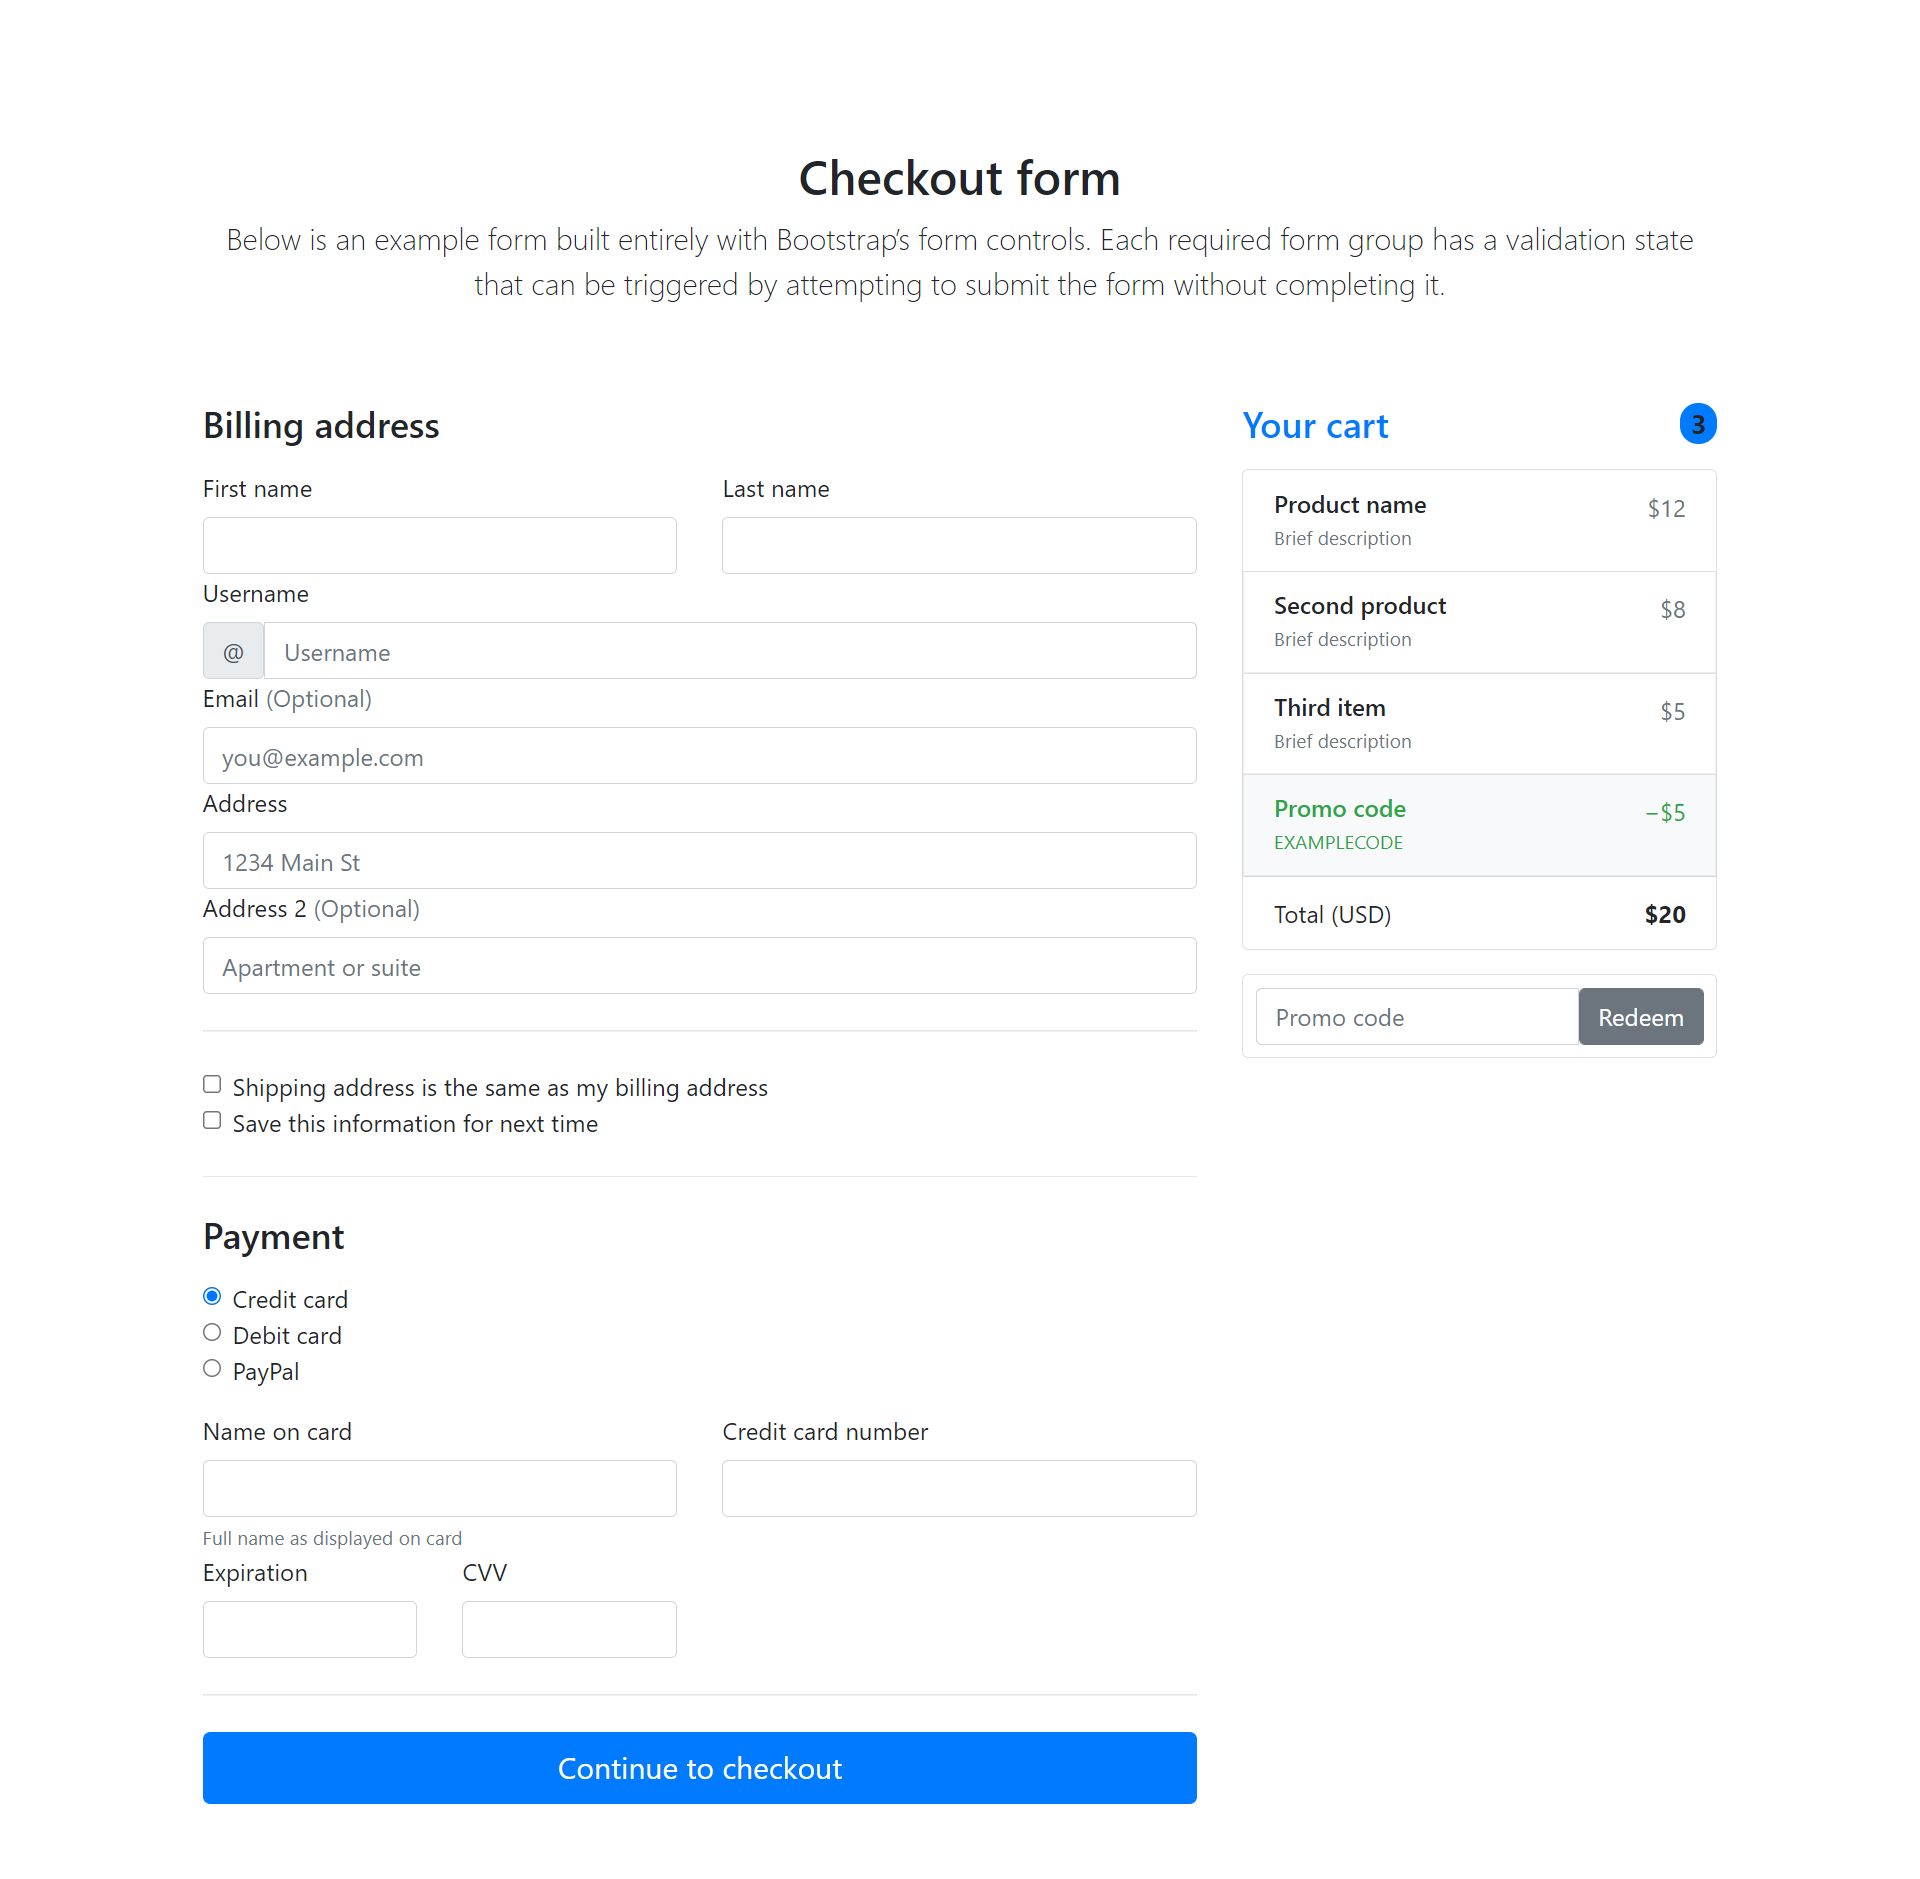
Save the changes and run the Angular application. You will have a screen like:

On the right side of the above screen, you can see a Your cart section. Let’s make it as a separate reusable Angular component.
Creating Reusable Angular Component
Create a new Angular component using the Angular CLI.
ng g component cart
Remove the Your cart HTML portion from app.component.html and add to cart.component.html file.
<div>
    <h4 class="d-flex justify-content-between align-items-center mb-3">
        <span class="text-primary">Your cart</span>
        <span class="badge bg-primary rounded-pill">3</span>
    </h4>
    <ul class="list-group mb-3">
        <li class="list-group-item d-flex justify-content-between lh-sm">
            <div>
                <h6 class="my-0">Product name</h6>
                <small class="text-muted">Brief description</small>
            </div>
            <span class="text-muted">$12</span>
        </li>
        <li class="list-group-item d-flex justify-content-between lh-sm">
            <div>
                <h6 class="my-0">Second product</h6>
                <small class="text-muted">Brief description</small>
            </div>
            <span class="text-muted">$8</span>
        </li>
        <li class="list-group-item d-flex justify-content-between lh-sm">
            <div>
                <h6 class="my-0">Third item</h6>
                <small class="text-muted">Brief description</small>
            </div>
            <span class="text-muted">$5</span>
        </li>
        <li class="list-group-item d-flex justify-content-between bg-light">
            <div class="text-success">
                <h6 class="my-0">Promo code</h6>
                <small>EXAMPLECODE</small>
            </div>
            <span class="text-success">−$5</span>
        </li>
        <li class="list-group-item d-flex justify-content-between">
            <span>Total (USD)</span>
            <strong>$20</strong>
        </li>
    </ul>

    <form class="card p-2">
        <div class="input-group">
            <input type="text" class="form-control" placeholder="Promo code">
            <button type="submit" class="btn btn-secondary">Redeem</button>
        </div>
    </form>
</div>
Now inside app.component.html file, add the app-cart component. Here is how the modified app.component.html file looks:
<div class="container">
  <div class="main">
    <div class="py-5 text-center">
      <h2>Checkout form</h2>
      <p class="lead">Below is an example form built entirely with Bootstrap’s form controls. Each required form group has
        a validation state that can be triggered by attempting to submit the form without completing it.</p>
    </div>
    <div class="row g-5">
      <div class="col-md-5 col-lg-4 order-md-last">
        <app-cart></app-cart>
      </div>
      <div class="col-md-7 col-lg-8">
         <!-- HTML Code removed for brevity. -->
      </div>
    </div>
  </div>
</div>
Passing Data Using @Input
Inside the cart component the data displayed is static data. Let’s pass some data to CartComponent using @Input directive. Define an @Input directive in cart.component.ts file:
@Input() products : Product[];
Product type seen above is a model defined inside app/model/product.ts
export class Product{
    public name : String;
    public description : String;
    public price : number;

    constructor(name, desc, price){
        this.name = name;
        this.description = desc;
        this.price = price;
    }
}
Now let’s define some products in the app.component.ts file. Import Product model and define an array and push some dummy data.
import { Component, OnInit } from '@angular/core';
import { Product } from '../app/model/product';

@Component({
  selector: 'app-root',
  templateUrl: './app.component.html',
  styleUrls: ['./app.component.css']
})
export class AppComponent implements OnInit {
  title = 'reusable-comp';

  products : Product[] = [];

  ngOnInit(){
    this.products.push(new Product('Gillete Razor','Shaving Razor', 100));
    this.products.push(new Product('Lenovo Laptop','Laptop', 2000));
    this.products.push(new Product('Trimmer','Hair trimmer', 2500));
  }
}
Now let’s pass the products array to the CartComponent from app.component.html.
<app-cart [products]="products"></app-cart>
Modify the cart.component.html code to iterate over the products and render the products.
<div>
  <h4 class="d-flex justify-content-between align-items-center mb-3">
    <span class="text-primary">Your cart</span>
    <span class="badge bg-primary rounded-pill">3</span>
  </h4>
  <ul class="list-group mb-3">
    <li *ngFor="let product of products" class="list-group-item d-flex justify-content-between lh-sm">
      <div>
        <h6 class="my-0">{{product.name}}</h6>
        <small class="text-muted">{{product.description}}</small>
      </div>
      <span class="text-muted">${{product.price}}</span>
    </li>
    <li class="list-group-item d-flex justify-content-between bg-light">
      <div class="text-success">
        <h6 class="my-0">Promo code</h6>
        <small>EXAMPLECODE</small>
      </div>
      <span class="text-success">−$5</span>
    </li>
    <li class="list-group-item d-flex justify-content-between">
      <span>Total (USD)</span>
      <strong>$20</strong>
    </li>
  </ul>

  <form class="card p-2">
    <div class="input-group">
      <input type="text" class="form-control" placeholder="Promo code">
      <button type="submit" class="btn btn-secondary">Redeem</button>
    </div>
  </form>
</div>
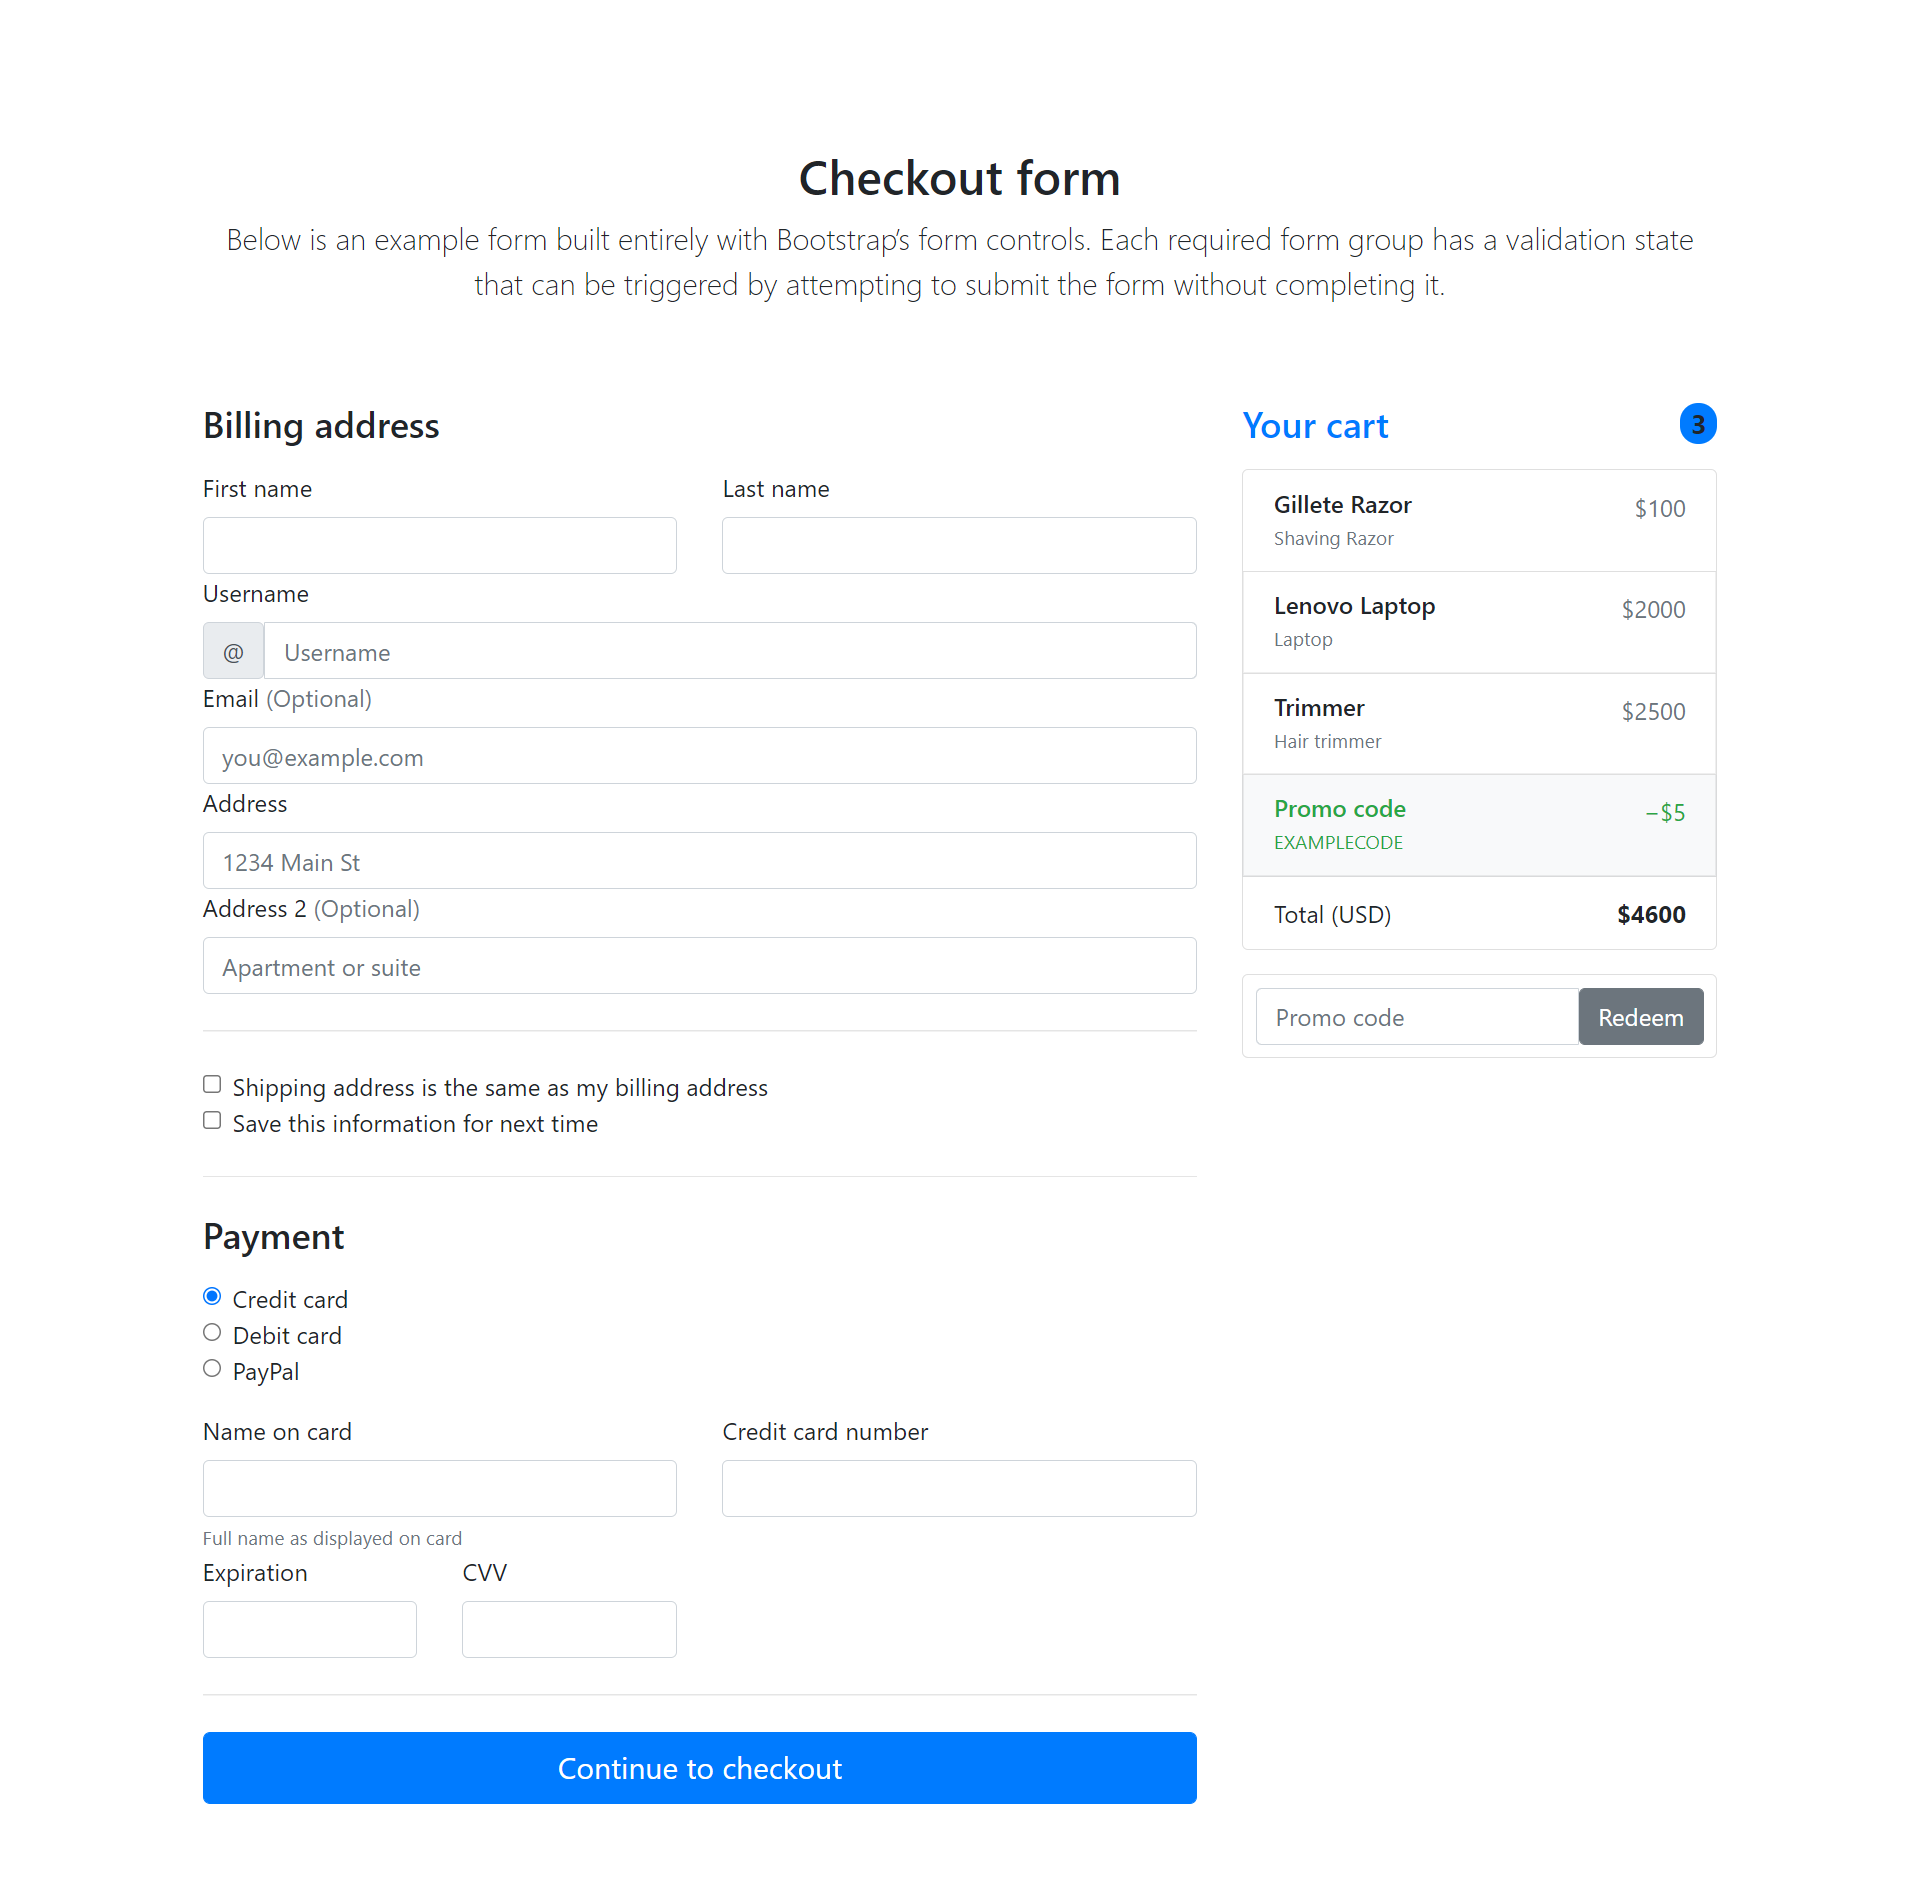
Save the changes and restart the Angular application. You’ll be able to see the passed in data being rendered in the cart section.

Emitting Data Using @Output
Since it’s a re usable component, it should input and emit data. You can emit data using the @Output Angular directive. Define a @Output emitter inside the cart.component.ts file.
@Output() priceEmitter = new EventEmitter<Number>();
Let’s define a method to calculate the sum of the products and emit it back to the parent component.
  calculatePrice(){
    for(let i = 0; i < this.products.length; i++){
      this.totalPrice += this.products[i]['price']
    }
    this.priceEmitter.emit(this.totalPrice);
  }
Here is how the complete cart.component.ts file looks:
import { Component, EventEmitter, Input, OnInit, Output } from '@angular/core';
import { Product } from '../model/product';


@Component({
  selector: 'app-cart',
  templateUrl: './cart.component.html',
  styleUrls: ['./cart.component.css']
})
export class CartComponent implements OnInit {

  totalPrice : number = 0;
  @Input() products : Product[];
  @Output() priceEmitter = new EventEmitter<Number>();

  constructor() { }

  ngOnInit(): void {
    this.calculatePrice();
  }

  calculatePrice(){
    for(let i = 0; i < this.products.length; i++){
      this.totalPrice += this.products[i]['price']
    }
    this.priceEmitter.emit(this.totalPrice);
  }
}
To capture the data from the emitter event, you need to define a method inside app.component.ts.
priceEmitter(value){
   console.log('total sum is ', value);
}
Let’s bind the parent method priceEmitter in app.component.ts to child’s event.
<app-cart (priceEmitter)="priceEmitter($event)" [products]="products"></app-cart>
Save the above changes and you will be able to see the total price emitted to the parent component and logged in the browser console.
Source Code
In this tutorial, you learnt how to create a reusable Angular component using the @Input and @Ouput Angular directives.
Source code from this tutorial can be found at GitHub.