In this tutorial, you’ll learn how to use react-table in React web app. If you are just getting started with React, I will recommend reading Learning React From Scratch to get started with react web application development.
Getting Started
Let’s get started with creating a React web app using Create React App. Once you have npm 5.2+ installed in your system, create the react web app using the following command:
// creating react app
npx create-react-app react-grid-demo
The above command will create the starter app for react web app. Once you have the project structure created, navigate to the project directory and start the web app.
cd react-grid-demo
npm start
Point your browser to http://localhost:3000/ and you will have the application running.
react-table In React Web App
react-table is an extendable data grid built specifically for react. In order to use react-table you need to install it using Node Package Manager(npm).
// install react-table
npm install react-table
Once you have react-table installed you need to import react-table into your react component. Import react-table in your src/App.js file.
// import react table
import ReactTable from "react-table";
Assume that you have some JSON data which needs to be rendered using react-table.
const data = [{
      name: 'Roy Agasthyan',
      age: 26
    },{
      name: 'Sam Thomason',
      age: 22
    },{
      name: 'Michael Jackson',
      age: 36
    },{
      name: 'Samuel Roy',
      age: 56
    },{
      name: 'Rima Soy',
      age: 28
    },{
      name: 'Suzi Eliamma',
      age: 28
    }]
Inside the render method of the React component return the ReactTable.
return (
          <div>
              <ReactTable />
          </div>
    )
To render the JSON data as table using react-table, you need to bind the JSON as data attribute to the ReactTable.
return (
          <div>
              <ReactTable
                data={data}
              />
          </div>
    )
Along with the data you need to specify columns attribute with the column info. Define the columns as shown:
const columns = [{
      Header: 'Name',
      accessor: 'name'
    },{
      Header: 'Age',
      accessor: 'age'
    }]
As shown in the above JSON, accessor maps the JSON data’s key to the specific column properties. For example accessor name has header defined as Name, similarly accessor age has header defined as Age. Add the columns attribute to the ReactTable. Here is how the App component in the App.js looks:
import React, { Component } from 'react';
import ReactTable from "react-table";
import "react-table/react-table.css";

class App extends Component {

  render() {
    const data = [{
      name: 'Roy Agasthyan',
      age: 26
    },{
      name: 'Sam Thomason',
      age: 22
    },{
      name: 'Michael Jackson',
      age: 36
    },{
      name: 'Samuel Roy',
      age: 56
    },{
      name: 'Rima Soy',
      age: 28
    },{
      name: 'Suzi Eliamma',
      age: 28
    }]

    const columns = [{
      Header: 'Name',
      accessor: 'name'
    },{
      Header: 'Age',
      accessor: 'age'
    }]

    return (
Save the above changes and you will have the JSON data rendered in a tabular format.
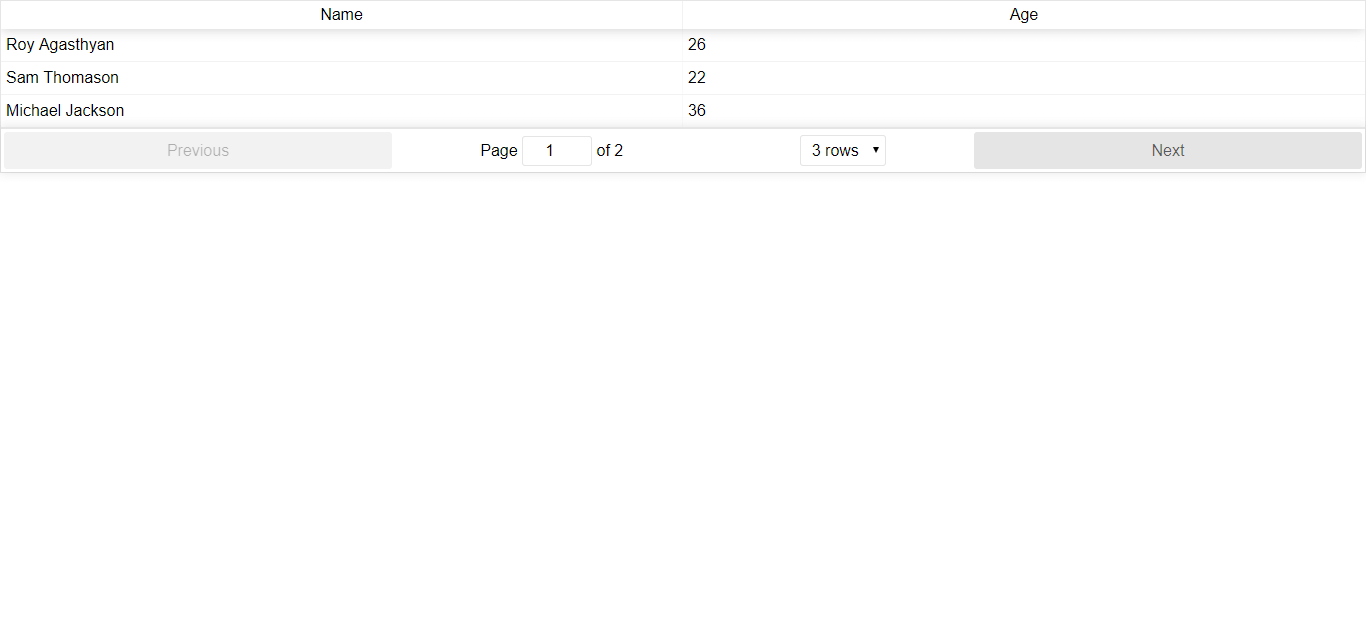
Along with the data and columns attribute you have also added two more attributes, defaultPageSize and pageSizeOptions.
Wrapping It Up
In this tutorial, you learnt how to get started with using react-table in react web app. There are a lot of options to customize the ReactTable. For a detailed info, I will recommend reading the official react-table documentation.
Do let us know your thoughts and suggestions in the comments below.