FastAPI is a modern web framework for creating API using Python 3.6+. We already did a couple of tutorial on FastAPIs. Do refer them if you are just getting started with FastAPI.
- Creating APIs using Python FastAPI
- Reading Request Body During POST Request in FastAPI
- Reading Query Parameters During GET Request in FastAPI
In this tutorial, you’ll learn how to host a APIs creating using FastAPI on Clouding.io cloud server. Before getting started with app development and hosting, let’s learn a bit about Clouding.
Clouding is a virtual private server platform having years of experience in the cloud space. High availability is their forte and you pay for what you only use.
Following are the features offered by Clouding :
- High Availability.
- Round the clock monitoring.
- 100% redundancy .
- Triple Replica
- Guaranteed Performance
- Pay for what you use. You also have the option to archive the server. Here is how to archive your server.
Here is an interesting read about behind the scene physical hardware which makes all this possible.
Now let’s see how to create and deploy an API using FastAPI on Clouding.
Installing FastAPI
Assuming you already have Python3.6+ installed in your system, start by installing FastAPI using pip.
pip install fastapi
You’ll be using Uvicorn, a lightning-fast ASGI server for running the API. Install it using pip.
pip install uvicorn
Creating the API
Create a file called main.py and import FastAPI.
from fastapi import FastAPI
From FastAPI, create an app using fastapi.
from fastapi import FastAPI
rootApp = FastAPI()
Define an API endpoint /fetchEmployeeData.
from fastapi import FastAPI
rootApp = FastAPI()

@rootApp.get("/fetchEmployeeData")
def fetchEmployeeData():
    return {"employees": [{
      "firstName" : "Roy"
    },{
      "firstName" : "Sam"
    }]}
Save the main.py file. Navigate to your terminal and run the uvicorn server.
uvicorn main:rootApp
In the above command main is the file name and rootApp is the FastAPI app name used. You can access the endpoint from [http://localhost:8000/fetchEmployeeData](http://localhost:8000/fetchEmployeeData).
Now let’s see how you can host the app creating using FastAPI can be deployed on cloud platform Clouding.io.
Deploying FastAPI on Clouding
You’ll be using Docker to deploy the API on Clouding. Here is a summary of what you’ll be doing to deploy the API.
- Adding a Dockerfile to your project.
- Creating clouding server.
- SSH to the docker server.
- Clone the API project from git.
- Docker image creation.
- Running the docker image.
So, let’s get started.
Adding Docker file
For deploying the project using Docker, you need to have a docker configuration file in your project. Add the following Docker file to the project.
FROM python:3.9

WORKDIR /code

COPY ./requirements.txt /code/requirements.txt

RUN pip install --no-cache-dir --upgrade -r /code/requirements.txt

COPY ./ /code/app

CMD ["uvicorn", "app.main:rootApp", "--host", "0.0.0.0", "--port", "80"]
Now you can push your code to GitHub repository. Later we’ll clone from the Git to the clouding server.
Creating Clouding Server
Login to your account on Clouding and create a new server using Docker app.
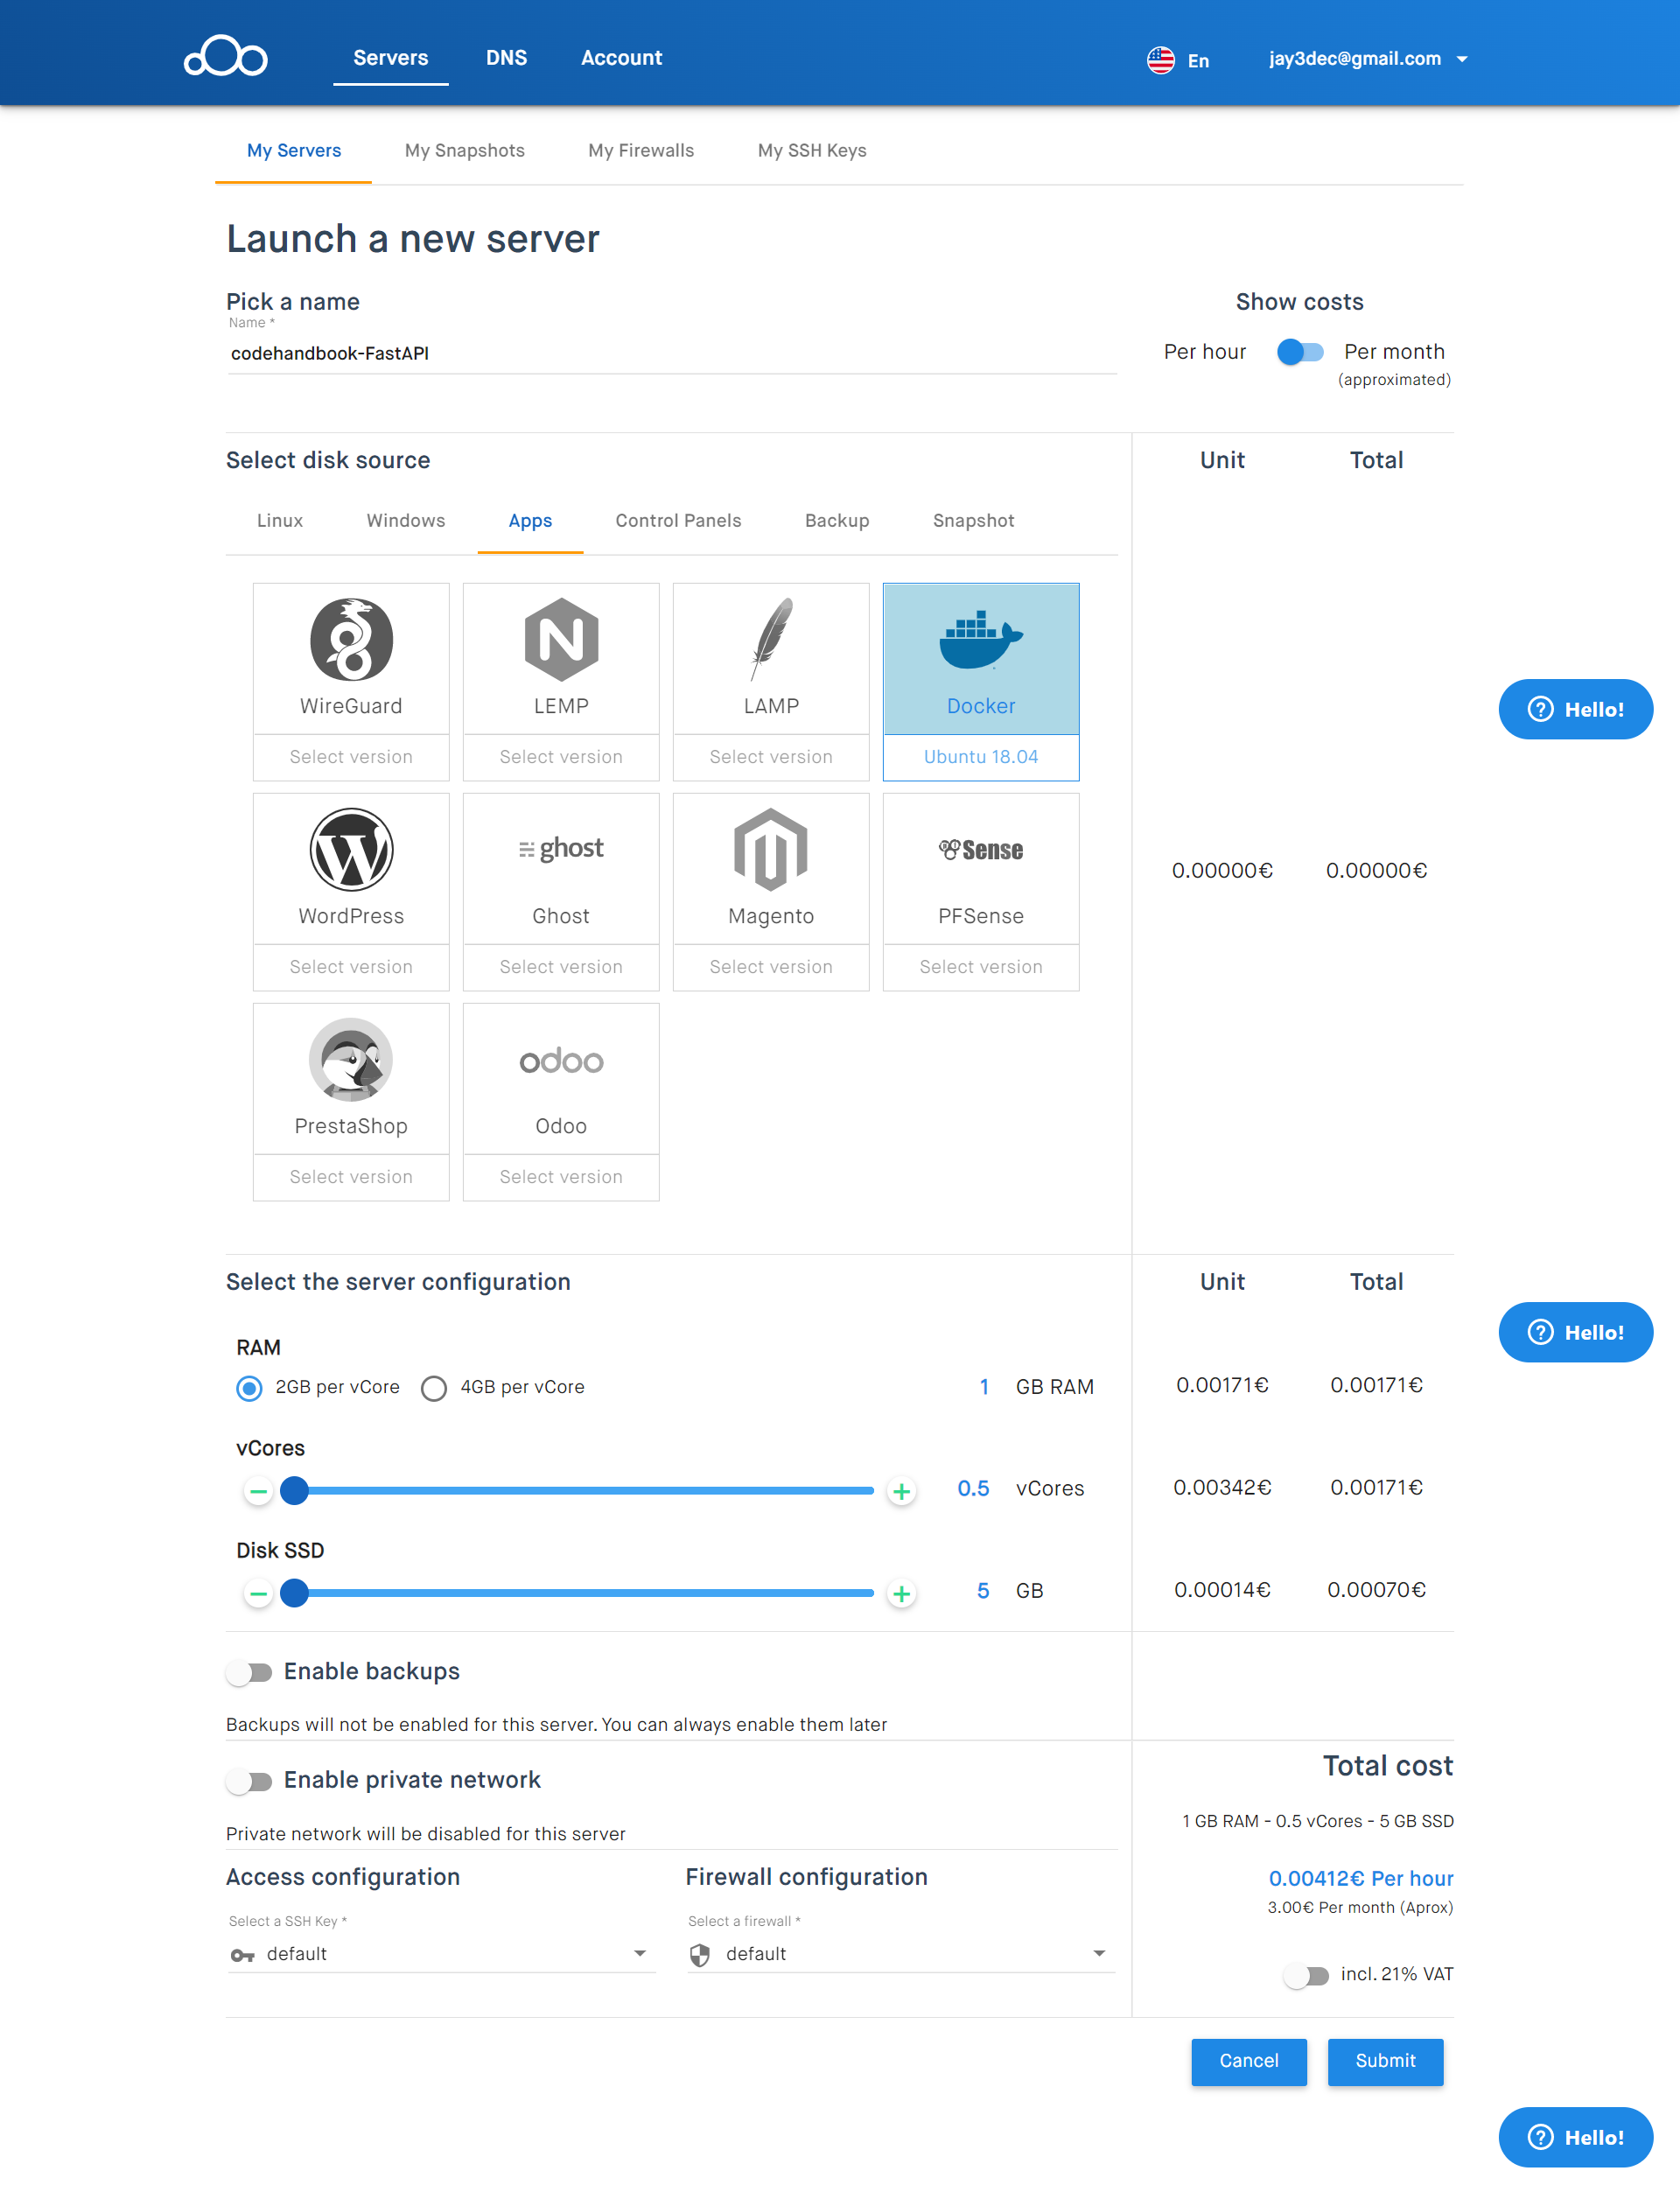
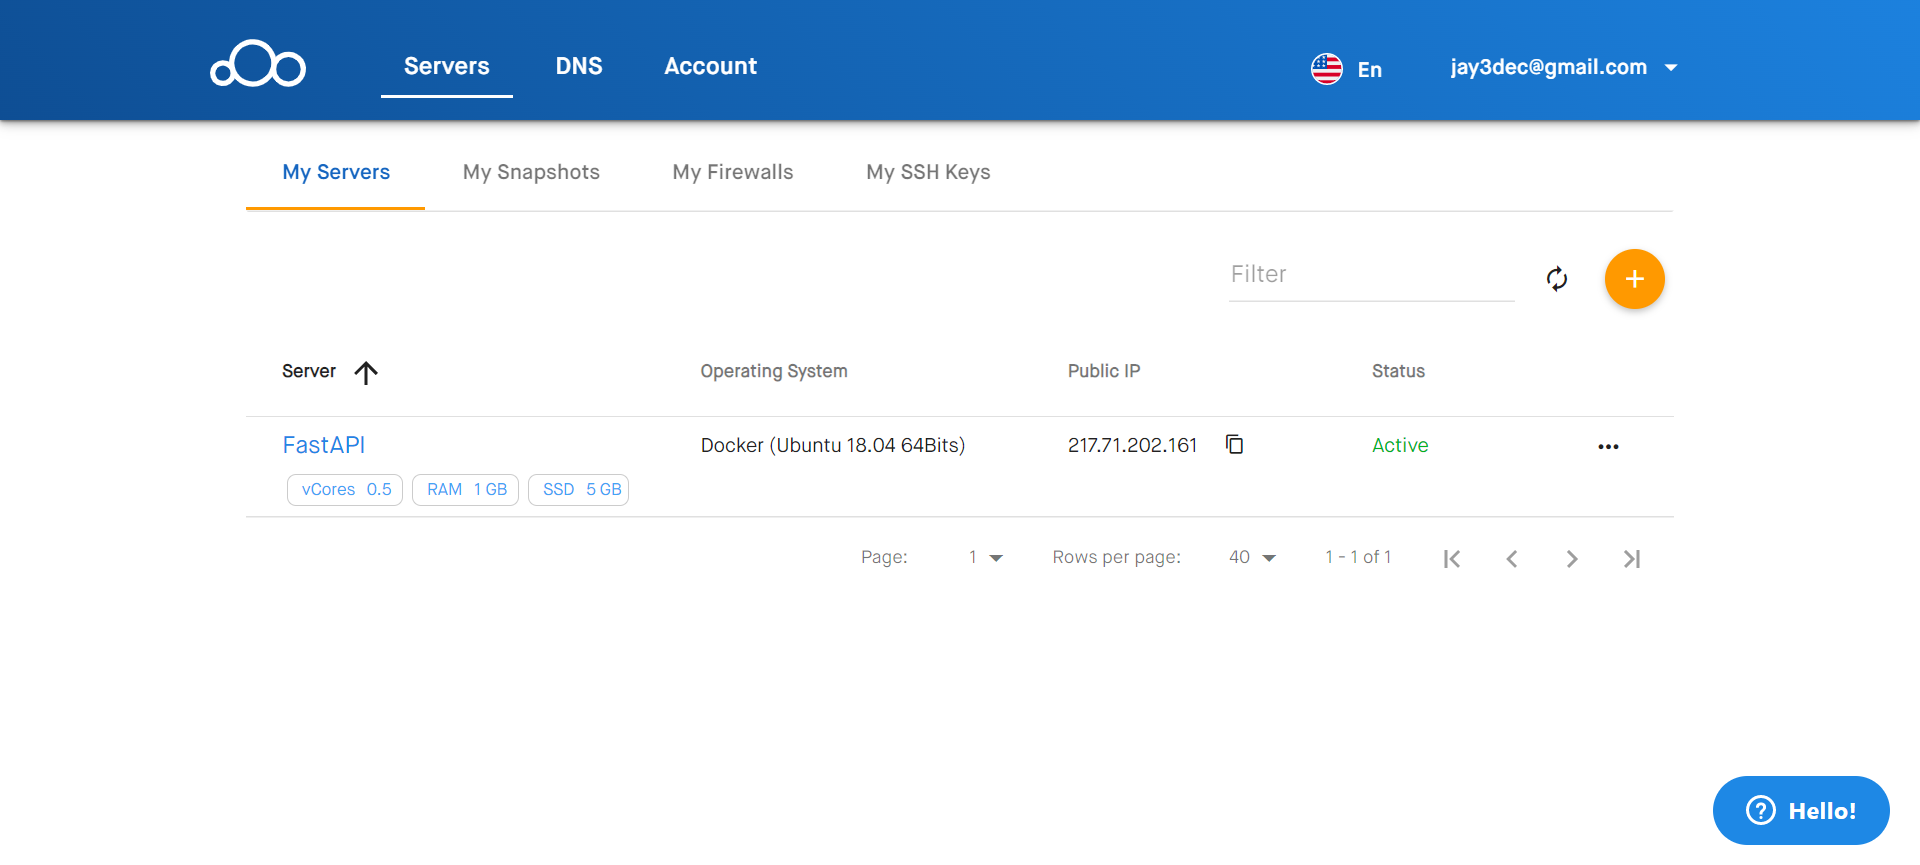
Keep every other configuration a default one and create the server. Once the server is ready it will be listed in the servers list.
SSH to Docker server
Once the server is active click the server and go to the settings tab. You’ll find the IP address, username and password to ssh the clouding server.
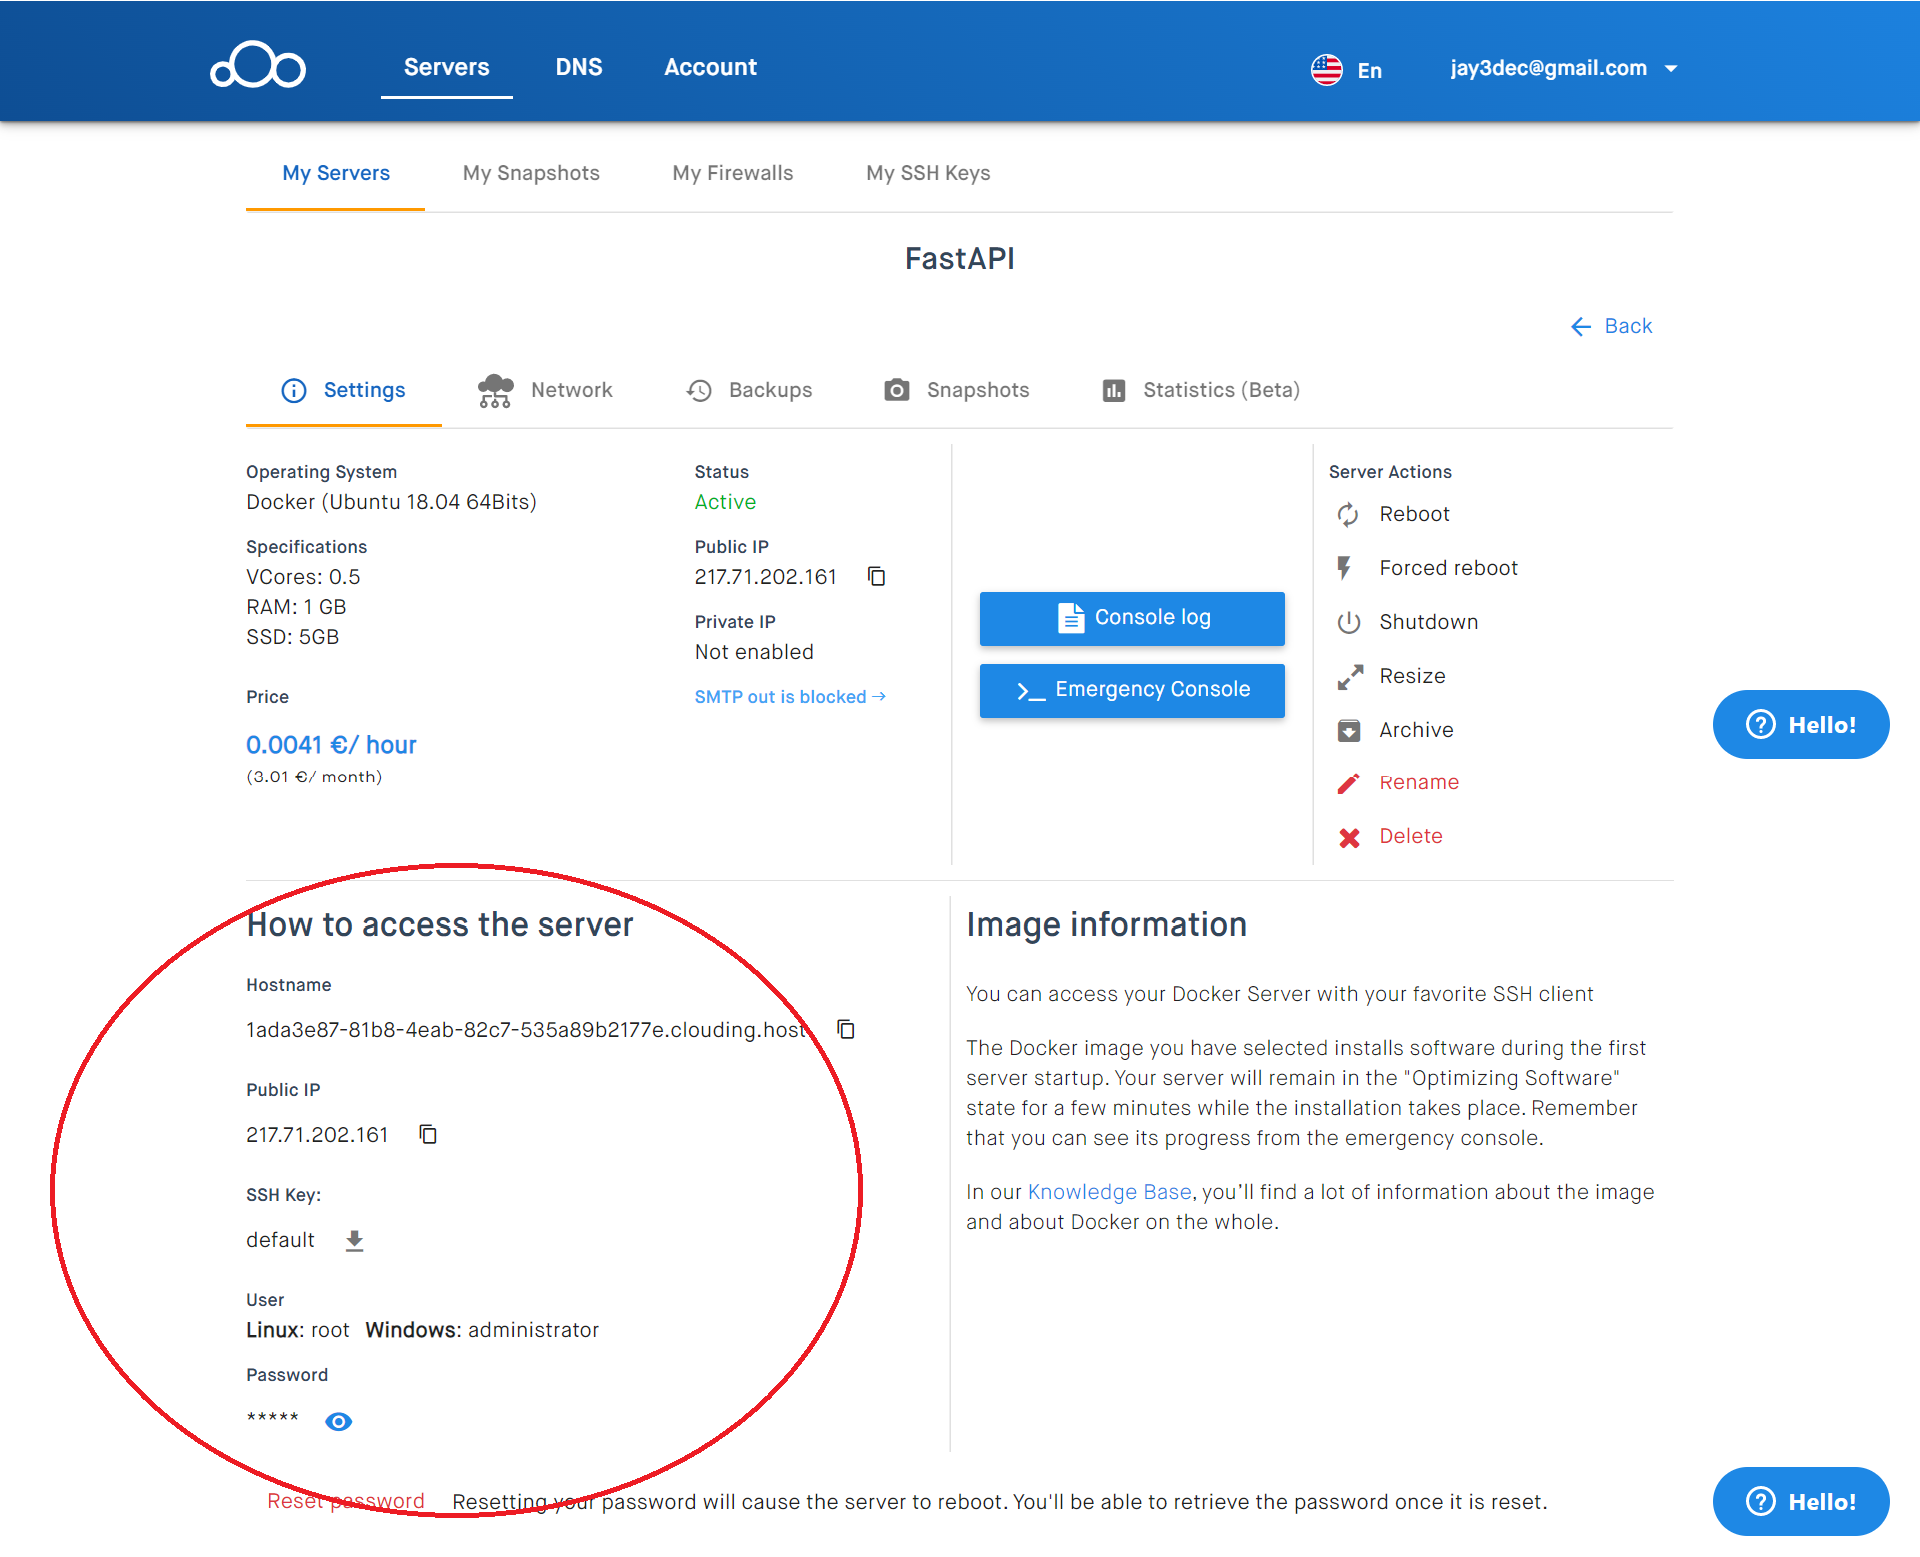
Once you have the required information you can ssh the docker server using the following command:
ssh root@ip
The above command will prompt for the password and once you enter the correct password, you’ll be logged into the server.
Clone the Repository
From the server, you can clone the source code using the following command:
git clone https://github.com/jay3dec/fastapi.git
Image Creation
Once you have cloned the source code, navigate to the project folder and create the Docker image using the following command;
cd fastapi
docker build -t api .
The command will create a docker image using the Dockerfile configuration. Now you need to run the app using the image.
Running App
Use the following command to run the Docker image api.
docker run -p 80:80 api
Point your browser to the IP address mentioned in the server settings at port 80 followed by the API endpoint.
http://your-ip-address/fetchEmployeeData
You will get the API response in the browser.
Wrapping it up
In this tutorial, you have learned about Clouding, a VPS hosting service. You have learned how to build and deploy an API built using Fast API web framework. You have also learned how to deploy the API application using Docker onto Clouding.
Remember that if you register on Clouding’s website, and complete three simple steps, you can access your client panel and try the cloud platform with 5€-free balance