Using Child Components in Angular Material Tabs. Let’s see how to work with different Angular child components inside mat-tab.
What you’ll create
Our app will have two tabs, New Employee and All Employees.
We’ll create a form to add new employees in one tab and in the other tab we’ll list all the existing employees.
Setting it up
If new to Angular material tabs, first go through the following introductory Material Tabs tutorials.
To begin with, clone the source code from the previous tutorial.
Once you have it up and running, let’s start creating the required components.
Create New Employee Component
Let’s create the new employee component using the Angular CLI.
ng g component new-employee
Once you have the components created add the app-new-employee component to the first tab.
<div class="container">
  <mat-tab-group mat-align-tabs="start" [selectedIndex]="tabIndex">
    <mat-tab label="New Employee" >
      <app-new-employee></app-new-employee>
    </mat-tab>
    <mat-tab label="All Employees" >

    </mat-tab>
  </mat-tab-group>
</div>
Now let’s add a form to add new employee information. You’ll be making use of Reactive forms to create a employee creation form.
Create All Employees Component
Let’s create the all employee component using the Angular CLI.
ng g component all-employee
Add the app-all-employee component to the second tab.
<div class="container">
  <mat-tab-group mat-align-tabs="start" [selectedIndex]="tabIndex">
    <mat-tab label="New Employee" >
      <app-new-employee></app-new-employee>
    </mat-tab>
    <mat-tab label="All Employees" >
      <app-all-employee></app-all-employee>
    </mat-tab>
  </mat-tab-group>
</div>
Save the above changes and refresh the application. In the first tab you have the New Employee component and in the second tab you have the All Employees component.
Service For Data Store
Create a service file which will keep a list of employees created, and some default employees.
Create a folder called service inside the app folder. And inside the service folder create a service file called data.
cd \src\app\service
ng g service data
Let’s create methods getEmployees and addEmployee to get the list of employees and to add new employees respectively. Both methods will mimic an API call and return an observable.
import { Injectable } from '@angular/core';
import { of } from 'rxjs';
import Employee from '../model/employee';

@Injectable({
  providedIn: 'root'
})
export class DataService {

  employees : Employee[] = [{
    fName : 'Sam',
    lName : 'Johnson',
    age : 32,
    country : 'USA'
  },{
    fName : 'Raghav',
    lName : 'Sharma',
    age : 30,
    country : 'India'
  }];

  constructor() { }

  getEmployees(){
    return of([...this.employees]);
  }

  addEmployee(employee : Employee){
    this.employees.push(employee);
    return of({
      status : 200,
      message : "Data inserted"
    })
  }
}
Show Employee List
You can create an instance of the DataService inside the AllEmployeeComponent component and call the getEmployees method to get the list of employees.
Here is how the all-employee.component.ts file looks:
import { Component, OnInit } from '@angular/core';
import Employee from '../model/employee';
import { DataService } from '../service/data.service';

@Component({
  selector: 'app-all-employee',
  templateUrl: './all-employee.component.html',
  styleUrls: ['./all-employee.component.css']
})
export class AllEmployeeComponent implements OnInit {

  allEmployees : Employee[] = [];
  constructor(private service : DataService) { }

  ngOnInit(): void {
    this.getEmployees();
  }

  getEmployees(){
    this.service.getEmployees().subscribe((response) => {
      this.allEmployees = response;
    })
  }

}
Modify the HTML code from all-employee.component.html to render the allEmployees data in tabular form.
<table class="table">
    <thead>
      <tr>
        <th scope="col">#</th>
        <th scope="col">First Name</th>
        <th scope="col">Last Name</th>
        <th scope="col">Age</th>
        <th scope="col">Country</th>

      </tr>
    </thead>
    <tbody>
      <tr *ngFor="let item of allEmployees;let i = index;">
        <th scope="row">
           {{i + 1}}
        </th>
        <td>
           {{item['fName']}}
        </td>
        <td>
           {{item['lName']}}
        </td>
        <td>
           {{item['age']}}
        </td>
        <td>
           {{item['country']}}
        </td>
      </tr>

    </tbody>
  </table>
Save the above changes and refresh the Angular application. You will be able to see the list of employees in the All Employees tab.
Add New Employee
Let’s start by creating a form to add new employee details. Add the following HTML to the new-employee.component.html:
<form>
    <div class="form-group display-flex">
      <div>
        <input type="text" class="form-control" placeholder="First Name">
      </div>
      <div>
        <input type="text" class="form-control" placeholder="Last Name">
      </div>
    </div>
    <div class="form-group display-flex">
        <div>
          <input type="text" class="form-control" placeholder="Age">
        </div>
        <div>
          <input type="text" class="form-control" placeholder="Country">
        </div>
      </div>
    <button type="submit" class="btn btn-primary">Submit</button>
  </form>
You’ll be using the Angular Reactive Forms to create the Angular Forms. Start by importing FormsModule and ReactiveFormsModule in app.module.ts file.
import { NgModule } from '@angular/core';
import { BrowserModule } from '@angular/platform-browser';

import { AppRoutingModule } from './app-routing.module';
import { AppComponent } from './app.component';
import { BrowserAnimationsModule } from '@angular/platform-browser/animations';
import { MatTabsModule } from '@angular/material/tabs';
import { NewEmployeeComponent } from './new-employee/new-employee.component';
import { AllEmployeeComponent } from './all-employee/all-employee.component';
import { FormsModule, ReactiveFormsModule } from '@angular/forms';

@NgModule({
  declarations: [
    AppComponent,
    NewEmployeeComponent,
    AllEmployeeComponent
  ],
  imports: [
    BrowserModule,
    AppRoutingModule,
    BrowserAnimationsModule,
    MatTabsModule,
    FormsModule,
    ReactiveFormsModule
  ],
  providers: [],
  bootstrap: [AppComponent]
})
export class AppModule { }
To make a form Reactive you’ll be making use of FormBuilder. Import it in new-employee.component.ts file and initialize an instance in constructor. Using the form builder instance, create a form group. Here is how it looks:
import { Component, OnInit } from '@angular/core';
import { FormBuilder, FormGroup } from '@angular/forms';
import Employee from '../model/employee';
import { DataService } from '../service/data.service';

@Component({
  selector: 'app-new-employee',
  templateUrl: './new-employee.component.html',
  styleUrls: ['./new-employee.component.css']
})
export class NewEmployeeComponent implements OnInit {

  formGroup! : FormGroup;
  constructor(private formBuilder : FormBuilder, private service : DataService) { }

  ngOnInit() {
    this.formGroup = this.formBuilder.group({
      fName : [''],
      lName : [''],
      age : [0],
      country : ['']
    })
  }

  saveForm(){
    this.service.addEmployee(this.formGroup.value).subscribe((response) => {
      console.log('response ', response);
    })
  }

}
Modify the html in new-employee.component.html to include formGroup and formControlName in the input.
<form [formGroup]="formGroup">
    <div class="form-group display-flex">
      <div>
        <input type="text" formControlName="fName" class="form-control" placeholder="First Name">
      </div>
      <div>
        <input type="text" formControlName="lName" class="form-control" placeholder="Last Name">
      </div>
    </div>
    <div class="form-group display-flex">
        <div>
          <input type="number" formControlName="age" class="form-control" placeholder="Age">
        </div>
        <div>
          <input type="text" formControlName="country" class="form-control" placeholder="Country">
        </div>
      </div>
    <button type="button" (click)="saveForm()" class="btn btn-primary">Submit</button>
  </form>
Save the app and you should be able to see the form to add new employee in the first tab.
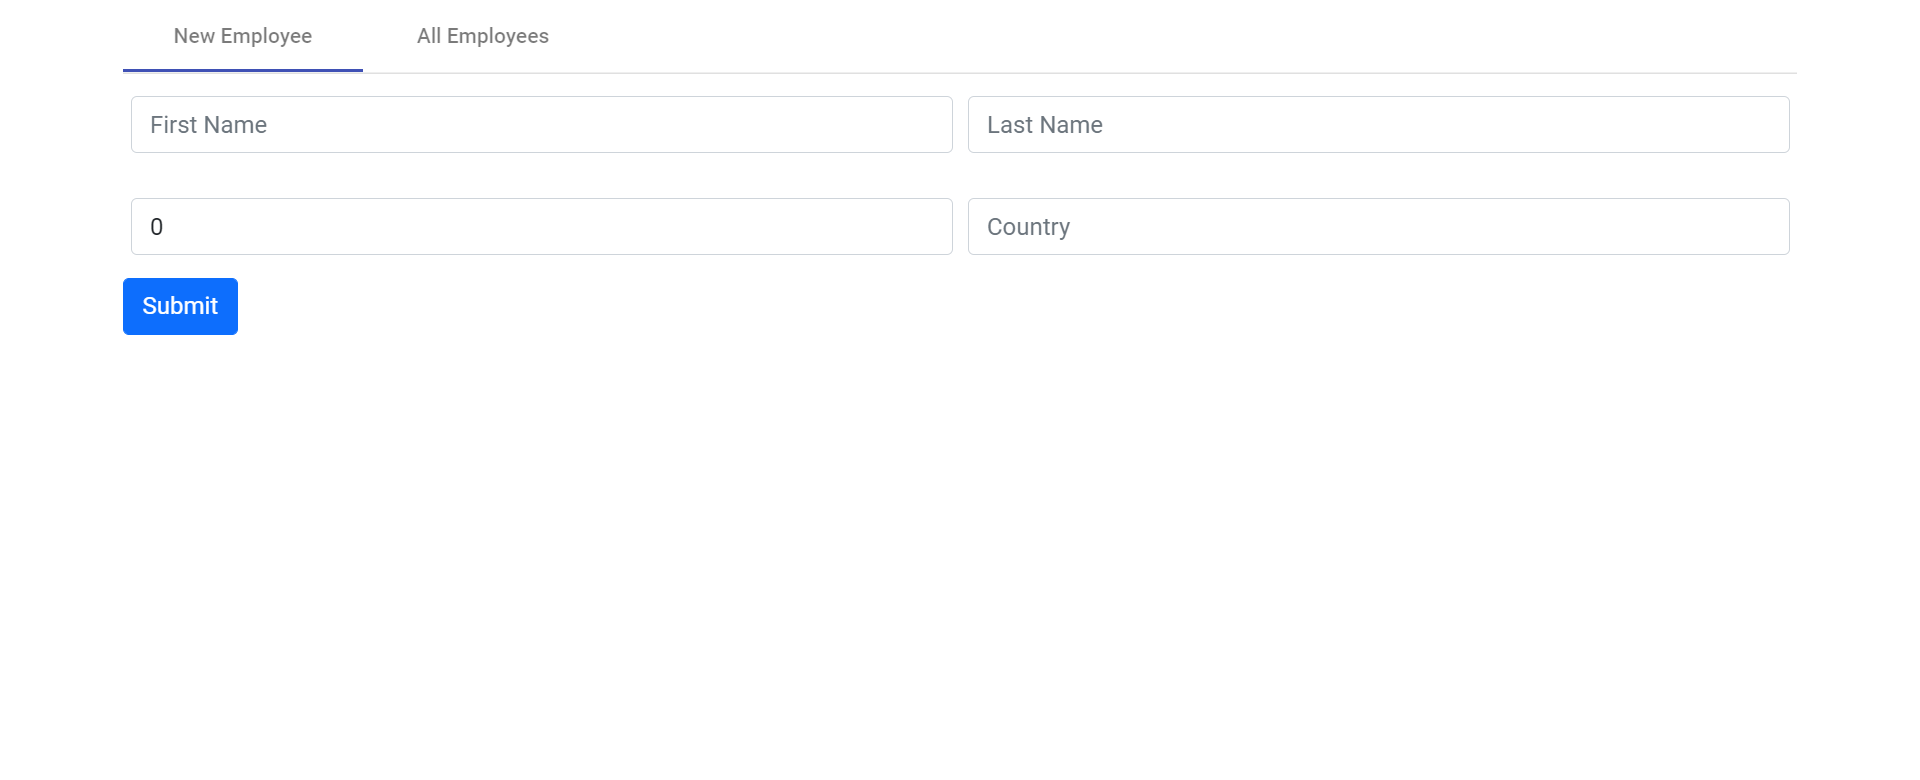
Enter the details and click save. The form details will updated to the DataService’s employees array.
The next task will be be reload the child component in the All Employees tab. Let’s see how to reload a child component in Angular in the next tutorial.